
Microsoft Azure – ‘You Can’t Get There From Here’ – How Do I Get There?!?
Introduction
Microsoft Azure is one of the greatest recent innovations by Microsoft. Its ability to enhance collaboration has without a doubt contributed to increasing productivity for countless organisations and businesses. If you have read our blog post or watched our YouTube video on ‘keeping your business and yourself safe’. You will also know how imperative Microsoft Azure is in allowing hybrid working, particularly in making ‘Bring Your Own Device’ work best for employer and employee. However, if you have used this tool, you will also know, as with anything, it doesn’t come without its hiccups and complications.

Some of you may have encountered the above error message, ‘You can’t get there from here’. Sadly, Microsoft tells you, you can’t get there, but doesn’t advise of a solution with the route you should take. So, if ‘you can’t get there from here’ then which way should you go? Luckily, you’ve taken the right detour, as in this blog post we’ll tell you exactly what you need to do, to get from there to here, just as easy as following your sat nav.
Finding the Right Settings
No matter where you are in your PC, the steps are always the same! This is a one-way system, nice and easy to get you to your destination. Firstly, you want to click on the start menu.
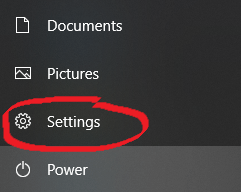
Once you have opened the start menu (the windows button in the very bottom-left corner), you will want to access the settings (you can do that by clicking the little gear that appears after the menu has been opened). You should be presented with a window similar to the one below:
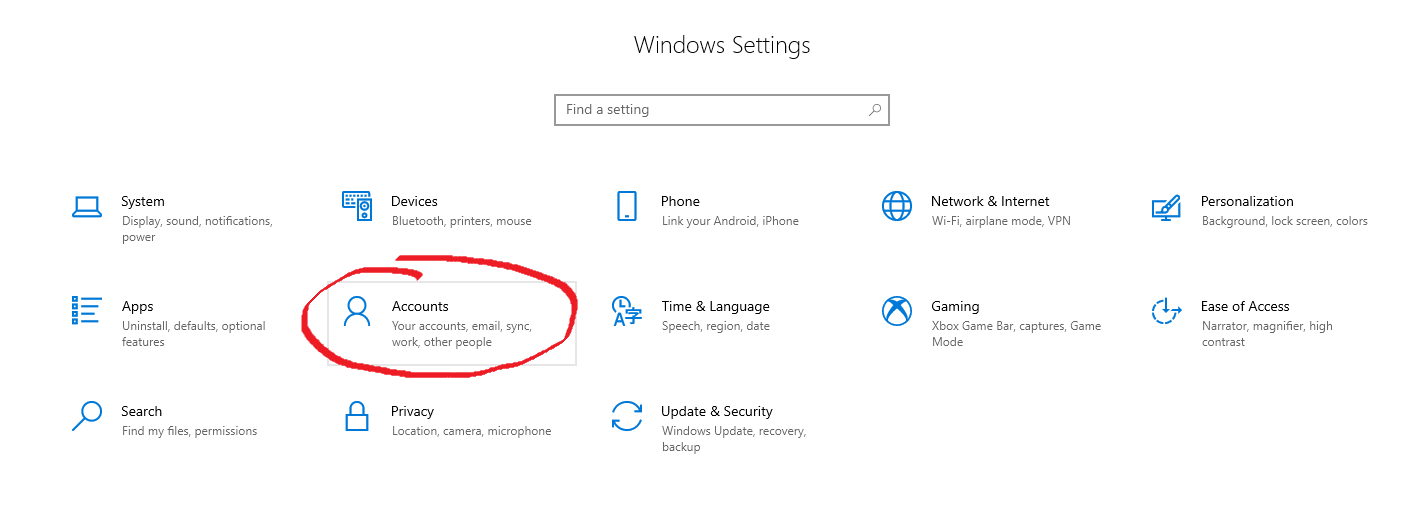
Once you get to this window, you will need to access the accounts section of the setting. This is the section that is circled in red in the above photo and should always appear in a similar location within the settings tab. It will then take you to the accounts section, where you will be presented with a window with a side tab. In the side tab, you will need to navigate to access work or school and click as in the picture below.

Once you have chosen to show the access work or school part, you will be presented with a screen similar to the one below saying “Connected to _________ Microsoft Azure AD”:

Now once here you just need to have a quick scan of the details making sure you are connected to your companies Microsoft Azure and connected using your own account. Assuming that all checks out then the issue must be elsewhere, so we at this point click on the info section, which is highlighted in red in the above image.
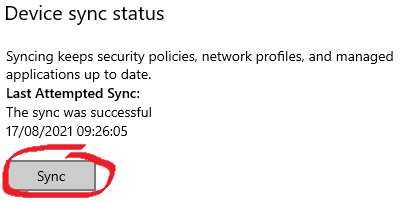
You should then be presented with the above section. You will need to click sync and follow any instructions to sign in to your work Microsoft account. Once this has been completed access should be reinstated. However, if it hasn’t or if you would like to take an extra step to sure things up, we advise restarting the device to allow for full resynchronisation.
Final Remarks
This article is the third in a series that goes hand in hand with our YouTube Series ‘how to protect yourself and your business’ in partnership with NatWest. If you haven’t had a chance yet we suggest you check out our YouTube videos! They are a great auditory guide that when accompanied by this article gives you the best understanding of Wi-Fi security and what to look for, as well as how to make the home network as secure as possible.
We hope this has helped you resolve any issues accessing shared files and data using the Microsoft Azure AD. If for whatever reason this article has failed to provide you with a resolution, please don’t hesitate to contact us now via our email or call us at 0330 1224 420. We will do further examination making sure the issues have been correctly identified and will provide you with the best solution going forward.
Questions: [email protected]
Here's our live calendar!Continue reading:
Office 365 Security and the Shared Responsibility Model






Recent Comments